CREATING A YOUTUBE CHANNEL FOR YOUR BUSINESS
Advertising your business on YouTube is a highly advantageous marketing move if you’re a small business owner or entrepreneur. Only 9% of businesses are currently using YouTube to advertise, making this a market with massive potential for you to tap into. If you’re not convinced, check out these stats:
- YouTube is the second-largest search engine with over 2 billion monthly active users
- 43% of customers buy something they saw in YouTube ads, even though 81% of them mute video ads. (Online Marketing Gurus)
- 80% of customers start deciding on purchase from watching YouTube videos about the product
- YouTube has the best ROI for video content, followed by Facebook and Instagram
- The average YouTube watch session on mobile lasts more than 60 minutes. (CNET, 2018)
It’s no secret that it pays to understand how to set up and optimize your channel correctly. Fortunately, this information is not complicated, and setting up an account only takes a few minutes. Here are the steps to get started.
Step 1: Create A Business Google Account
It’s best to keep your personal Google account separate from your business account. Sign in to your existing business account or create a new dedicated account and stay logged in.
Step 2: Create A YouTube Channel
- Go to YouTube.com
- Click on the Avatar Icon in the top right corner and select My Channel
- Select Use A Business or Other Name – YouTube gives you the option of using a business or product name for your channel
- Select Create
Step 3: Customize Your Channel
Customization consists of three sections:
Channel Icon
The channel icon is basically your profile image and is taken from your Google account. The icon is important because it’s one of the first things a new subscriber will see,  and it appears in more places on your channel than you might realize, such as your watch page, search results, video comments, the community tab, and more. The icon is usually an 800×800 px image of your logo. Keep in mind YouTube will give the image a circular crop. For consistency with branding, it’s best to use the same icon across social channels.
Channel Art
Channel Art, also known as YouTube Banner, is the large banner that goes across the top of your page. The banner size is 2560×1140 pixels and can’t exceed 6MB. Canva offers templates making it easy to customize and brand your banner. Always test your channel art across multiple devices because what looks good on a laptop may not look good on a desktop, mobile, or TV display.
It’s essential to choose a simple and effective banner but still represent your company as a whole. This means consistent visual branding with colors, fonts, logo’s and taglines.
You can use your banner to:
- sell merchandise by including a link to your online store
- send visitors to your website URL
- have a call to action
- promote an upcoming event
- describe your channel
Here is an excellent resource with tips and examples of great designs.
Channel Description
There are two types of descriptions, the description of your channel and the description of your videos. Here we will be talking about the channel description found under the About tab of your YouTube channel.
The description is your way of communicating your content and what viewers will see if they subscribe. Because this section only allows up to 1,000 characters, including spaces, this leaves you with approximately 200 words, so you want to make them count.
The first 125 characters of your channel description show up in your YouTube search results and your Google search results, so they are of utmost importance. You’ll want to directly call out your target audience, and while you want to define your content, you also want to let your audience know what makes you unique or better than other YouTube channels.
Some things to consider:
- use specific keywords that your ideal viewer might search for
- post your upload schedule
- include social media channels and product links
- have a call to action to subscribe
Here are a few examples of good descriptions — Kathleen Lights, The Sorry Girls, Vat19 and William Arruda.
Step 4: Buy The Right Equipment
Once you’ve completed your business channel’s setup, it’s time to consider what equipment you need to get started without breaking the bank. Initially, you can use your smartphone! With the YouTube mobile app, you can easily record, edit and upload your videos.
However, for a professional-looking video, you’ll need to make a more significant investment. There are three things you’ll need — something to record video, something to record audio, and something to edit video.
Video Recording
Camcorders, Webcams, and DSLR cameras are the most popular options among YouTubers for video recording. Here is an extensive list of cameras with reviews.
Audio Recording
You’ll want a great sound to complement the quality of your video. The perfect microphone depends on your needs. For example, are you desktop shooting or doing run and gun type videos? Here’s a list of YouTube mics by category.
Editing Software
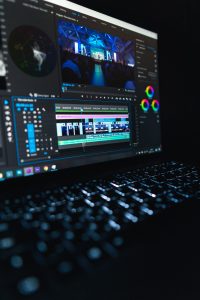
The final piece of the puzzle for producing quality content is to invest in some sort of video editing software. Things to consider are budget, ease of use, compatibility, and features and tools.
Fortunately, there are some excellent free options to choose from. The most used editing software by Youtubers? iMovie, which is great if you’re on a Mac. Here’s a tutorial for getting started. Next is Adobe Premier Pro. And finally, Final Cut Pro X.
Join NFICA for $5 a year
 Simply put, there is strength in numbers!
Group insurance rates have lower premiums because the risk is spread out among members, making it a better option for supplemental health and life insurance if you are self-employed.
You also get group discounts on a range of products and services, making these discounts alone worth the cost of membership. Learn more.